Contact us for all your culinary needs

Phone Number:
(780) 289-7220
Email: bolasterscatering@telus.net

Follow us for daily tips on Twitter & the Bolsters Catering Facebook page

Wednesday, September 29, 2010


Surprisingly, there is very little advice on the net for sharpening a potato peeler, and yet it is a simple and effective procedure. Many would ask, "Why sharpen a peeler when they are cheap to replace?". Simply because even brand new, a peeler works best when it's sharp - and even new ones are sometimes dull. Additionally, we live in a "throw away" society, and if you are like me, you'd like to resist the urge to just toss everything at the first impulse. So, simply follow these instructions, and your peeler can become a family legacy you can leave to your grandkids!

By running the tip of a paring knife along each blade of your peeler, the metal-on-metal action will restore some of your blade's edge. Most don't even notice their peelers starting to dull, but once you give this tip a try you'll dig how much less resistance you'll have as you take on potato after potato, carrot after carrot, this holiday season.

The same trick can be applied to any metal grater or blade in your kitchen. If you have the patience, try sharpening up your box grater or cheese slicer. Hit up discount stores, as you can usually find paring knives right around the dollar mark, and you won't mind if they get roughed up a bit.

Tuesday, September 21, 2010

Spaghetti Squash

The flesh of spaghetti squash comes out in long strands, very much resembling the noodles for which it is named. In this recipe, the 'noodles' are tossed with vegetables and feta cheese. You can substitute different vegetables, but be sure to use ones that have contrasting colors.

Serves 6

Ingredients

  • 1 spaghetti squash, halved lengthwise and seeded
  • 2 tablespoons vegetable oil
  • 1 onion, chopped
  • 1 clove garlic, minced
  • 1 1/2 cups chopped tomatoes
  • 3/4 cup crumbled feta cheese
  • 3 tablespoons sliced black olives
  • 2 tablespoons chopped fresh basil
Directions
  1. Preheat oven to 350 degrees F (175 degrees C). Lightly grease a baking sheet.
  2. Place spaghetti squash cut sides down on the prepared baking sheet, and bake 30 minutes in the preheated oven, or until a sharp knife can be inserted with only a little resistance. Remove squash from oven, and set aside to cool enough to be easily handled.
  3. Meanwhile, heat oil in a skillet over medium heat. Saute onion in oil until tender. Add garlic, and saute for 2 to 3 minutes. Stir in the tomatoes, and cook only until tomatoes are warm.
  4. Use a large spoon to scoop the stringy pulp from the squash, and place in a medium bowl. Toss with the sauteed vegetables, feta cheese, olives, and basil. Serve warm.

Wednesday, July 14, 2010

"Tapas" is the name of a wide variety of appetizers, or snacks. They may be cold (such as mixed olives and cheese) or warm. Tapas have evolved to become a key part of sophisticated cuisine, as more restaurants add tapas to their menu and people start experimenting in their home with a variety of items including delicious dips like Summer Fresh Original Hummus or Summer Fresh Tzatziki.

DÉCOR - Hosting your party outside is the perfect venue to compliment the food being served.

• To create an authentic experience, purchase a low table (similar to ones at authentic Japanese restaurants) and place large, over stuffed pillows in bold colours like pink, orange and teal on the ground around it. This will be the seating area.

• Place glass vases on the table to hold bamboo skewers and toothpicks to pick up food.

• Place an empty shot glass, or empty votive candle holder at each place setting for empty toothpicks.

• Set out pitchers of water, or sparkling water, along with white and red wine on ice.

• For a centerpiece place a line of pink or orange tea light holders down the middle of the tables and light the candles.

• If you want a bold centerpiece, fill a large vase with fresh, cut sunflowers.

FOOD EXPERIENCE – Create a decadent array of finger foods inspired by Spain!

• Set out dishes of olives, pita bread, oil and Summer Fresh Roasted Red Pepper Hummus.

• Fill a shot glass with Summer Fresh Seven Grain Salad for individual servings.

• Create “Patatas Bravas” by slicing russet potatoes into circles, brushing with Summer Fresh Spicy Artichoke & Asiago Dip and pan frying them. Serve HOT.

• Drizzle Summer Fresh Provolone & Onion Hot Cheesy Dip over grilled shrimp and skewer with grilled mushrooms.

• Spread Summer Fresh Spicy Hummus onto one side of a sliced baguette; add grilled chicken and Summer Fresh Taboulah Salad. Top with additional slice and cut into small pieces.

• Grill naan bread and cut into wedges. Serve with Summer Fresh Baba Ghanouj.

• Stuff button mushroom caps with Summer Fresh Greek Couscous Salad and serve with a tablespoon of Summer Fresh Roasted Garlic Hummus.

• Slice a cucumber in half lengthwise and scoop out a trough down the middle. Mix together Summer Fresh Bruschetta and feta cheese and fill the trough. Slice into 2" lengths and serve.

• Spread Summer Fresh Sundried Tomato & Kalamata Olive Feta Spread on to a slice of prosciutto and roll over a spear of asparagus.

• Pour Summer Fresh Sundried Tomato & Parmesan Dip over cooked meatballs, pierce with a toothpick and serve.

• For dessert, spoon Summer Fresh Maple Walnut Topping into chocolate shells.

• Spread Summer Fresh Cranberry Pomegranate Topping over a brick of cream cheese and heat for 10 seconds. Serve with Graham crackers.

APRÉS DINNER – As dinner winds down, sit back under the stars and relax!

• Provide guests with a variety of beverages including red & white wine, sangria, coffee and water.

• Put on some Spanish music and encourage your guests to get up and dance!

• As a party favour, create recipe cards for the tapas foods your guests have enjoyed.

Wednesday, May 19, 2010

Deep Fat Frying Tips


With health consciousness at such a high point these days, many people do not deep fry foods. But sometimes some fried food is just what you want! If you're going to consume the calories, make sure that the food is perfectly fried with these tips.

Deep fat frying is a dry heat cooking method. I know that sounds strange, but it's considered dry because no water is used, unlike poaching, microwaving, or simmering. Here's how to do it:

  • To start, choose your cooking oil carefully. Oils with high 'smoke points', in other words, those which do not break down at deep frying temperatures, are best. Peanut oil, safflower oil, sunflower oil, and canola oil are some good choices.
  • Choose a deep, very heavy skillet to fry with. Add oil to the cold pan, leaving a headspace, or space at the top of the pan, of at least two inches. This allows a safety margin when the oil bubbles up as the food is added.
  • Make sure that the food you're going to fry is dry. Letting it sit on paper towels, or coating it in flour or bread crumbs is a good way to ensure this. Let the coated food sit on a wire rack for 20-30 minutes so the coating dries and sets.
  • Begin heating the oil over medium high heat. If you have a deep fat frying thermometer, use it! The best temperature is 350 to 375 degrees F. If you don't have a thermometer, the oil is ready when a 1" cube of white bread dropped into the oil browns in 60 seconds; that oil temperature will be about 365 degrees F.
  • Don't overcrowd the pan! Carefully add the food, leaving lots of space around each piece so the food will cook evenly. If you add too much food at once, the oil temperature will drop and the food will absorb fat instead of instantly searing.
  • Watch the food carefully as it cooks, regulating the heat if necessary to keep that oil temperature between 350 and 375 degrees F. When the food is browned according to the time in the recipe, it's done. Remove it with a slotted spoon or a heavy stainless steel sieve with a long handle. Drop it onto paper towels to drain.
  • Fried foods can be kept warm in a 200 degrees F. oven until all the food is fried.
  • Oil and water DO NOT MIX!! Keep water away from the hot oil. If you pour water on the oil, the mixture will explode. If the oil smokes or catches fire, cover it with a pan lid or cookie sheet. You can use baking soda to put out any grease fires, but be careful that you don't spread the flames around.
  • I always keep a fire extinguisher in my kitchen, just in case. Learn how to use it NOW, before you may need it.
  • Don't reuse the cooking oil. Some sources say you can strain it and reuse it, but the oil has already begun to break down from the heat, and undesirable compounds like trans fats have formed. Let the oil cool completely, then discard safely.

Monday, May 17, 2010

Tips to the art of grilling

Grilling is an art, no doubt of that, and getting the food right is a matter of practice and technique. So, if you are having trouble getting your grilled foods to turn out just right, follow these grilling tips and tricks to ensure the best flavor for your grilled foods:

grilled food

If you follow a few simple tips and tricks, you can transform your grilled food into works of art.

1. Charcoal readily absorbs and holds moisture, so store it in a dry place.

2. To make cooking go faster, partially cook food in the microwave or on the range, and then immediately finish cooking the food on the grill. You'll get that barbecue flavor in less time.

3. Soak wooden skewers and toothpicks in water for at least 20 minutes before using them on a hot grill. The absorbed water will prevent the wood from burning.

4. The easiest way to clean a soiled grill is to scrub it with a stiff, wire brush while it's still warm.

5. While cooking, keep the fop and bottom grill vents open. Close them when cooking is finished to extinguish the coals.

6. Use tongs or a spatula to turn meat. Piercing it with a fork causes precious juices to escape.

How Hot Is It?
Your recipe says to heat the charcoal grill to 375°F. Like most cooks, you probably guess and then hope for the best. But there is a pretty reliable way to gauge the temperature of the coals without resorting to ripping the thermometer off the deck railing.

A quick and easy way to estimate the temperature of the coals is to hold the palm of your hand about four inches above the coals. Count the seconds you can hold your hand there before the heat forces you to pull it away. Then use the handy chart below to determine the temperature.­

­ ­
SecondsCoal Temperature
2 375°F or more
3 350° to 375°
4 300° to 350°
5 200° to 300°

MEAT, POULTRY, AND FISH GRILLING CHART
Use the following as a guide to approximate cooking times. You can also determine how well cooked your meat is with a good meat thermometer. Medium-rare beef will register 150°F on a meat thermometer; poultry, 180°; pork, 160°; lamb, 160°.

MeatThickness/WeightApprox Cooking Time (over med heat)
Chicken Boneless skinless breasts5 minutes per side
Chicken
Cut-up broiler/fryer
45 to 60 minutes
Fish fillets6 ounces3 to 5 minutes per side
Fish steaks1 inch5 minutes per side
Hamburgers 1/2 inch14 to 16 minutes
Pork baby back ribs 31/2 to 4 pounds30 to 45 minutes
Pork loin chops 3/4 inch10 to 12 minutes
Porterhouse/T-bone steak 3/4 inch14 to 17 minutes
Ribeye steak
3/4 inch6 to 8 minutes
Sausages
10 minutes
Shrimp Medium
2 to 3 minutes per side
Sirloin steak3/4 inch13 to 16 minutes

VEGETABLE GRILLING CHART
Brush vegetables lightly with vegetable oil and/or an oil-based salad dressing or marinade of your choice; season with sprinklings of chopped fresh or dried herbs, salt or pepper. Place large cuts directly on grill; grill smaller cuts in a grid basket.

VegetablePreparation for Grilling Grilling Time
Bell or chili peppersWhole or halved, stemmed and seeded 10 to 20 minutes
Corn on the cobUnhusked; remove silk; Soak in cold water 30 minutes
20 to 30 minutes
Eggplant Cut into 1-inch thick rounds 20 minutes
Mushrooms Stems removed 10 minutes
Onions Peel; cut into halves, wedges, or rounds; insert wooden picks to prevent separating. 20 to 30 minutes
Potatoes Cut into 1/2-inch thick rounds
10 to 12 minutes
Summer squashCut into halves or thick slices 5 to 10 minutes
Tomatoes Cut into halves or thick slices 5 to 10 minutes

Wednesday, May 5, 2010

Mother's Day lunch tabletop


Mother's Day is the perfect occasion for a dreamy, springlike table. Choose a light and simple colour scheme - whites, creams and soft neutral shades work well together, and will make the tabletop look fresh and pretty. Keep the background clean and understated. Use a plain white cloth, or leave the table bare; then add decoration in the form of scalloped white plates and feminine glassware.


Fresh flowers Flowers bring a tabletop to life, and often the simpler the arrangement, the better. A jug of seasonal flowers makes any table more inviting and 'dressed up'. If the flowers and scented, remove them before you sit down to eat, and keep displays low so guests can talk across the table.


Choose your own cutlery Help-yourself elements on a table create an easy atmosphere at a relaxed family lunch. Instead of laying out the cutlery/flatware at each place setting, stash it in a decorative jug or bowl, or pile it on napkins at the end of the table so that guests can help themselves to whatever they need.


Single blooms If you have any snapped-off flowerheads, use them as decoration. Just a single bloom wired to the bottom of a glass will make a perfect finishing touch.


Unique place holders Rather than sticking to standard place cards, think of innovative ways to indicate where guests should sit, such as a pretty ribbon and ornamental wired butterfly tied to the back of the chair with the guest's name on it.


Mother's Day lunch essentials

Feminine details
No matter the food you are serving for Mother's Day lunch, make the table girly. This occasion provides the perfect excuse for indulging in frills and femininity. Florals, butterflies and bows would all work here, so dust down your granny's scallop-edged china, bring out some shapely glassware and, above all, think pretty.
Simple background To prevent the overall effect from becoming too sweet, keep the background simple. Use a plain white cloth or leave the table bare or topped with a simple runner.


Neutral colour palette Keep the colour scheme light and bright. Whites, pale pastels and soft neutrals work well together and will not only make the tabletop look fresh and inviting, but provide the perfect backdrop for the decorative dinnerware and flowers.

Eating Local in Alberta

Do you want to join the eating local movement happening across Alberta but are wondering where to go to buy local food. Here are some options:


Farmers' Markets are one of the best ways to find local products. On our website you can find the markets in your region and find more information about the vendors who sell at those markets.

You can also go straight to the farm. For a great listing of information on local farms around the province go to the Alberta farm fresh Producers Association. Search by product type, order a free guide, or whatever it is you need to find local farms in Alberta, you can find them here!

Or eat out! Dine alberta has a list of restaurants across the province that serve local fare.

Finally, you can also visit Chomp around Alberta. Here you will find a link to each of the above sites, plus more - your one stop shop for eating local in Alberta.

Tuesday, May 4, 2010

Mexican Tortilla Chicken Soup

Tired of plain old Chicken Soup? Try this one. Adding the avocado is a must! We also add a little grated cheese and crushed tortilla chips.


Yield: 2 quarts

Ingredients

  • 2 tablespoons extra-virgin olive oil
  • 2 medium white onions, diced
  • 2 garlic cloves, minced
  • 2 jalapenos, seeded and minced
  • 3 ripe medium tomatoes, chopped
  • 1 quart chicken stock, recipe follows
  • Salt and freshly ground black pepper
  • Canola oil, for pan-frying
  • 8 corn tortillas, cut into 1/8-inch-thick strips
  • 1 1/2 cups shredded cooked chicken
  • 2 avocados, halved, pitted, peeled, and diced
  • 1 cup shredded Jack cheese, optional
  • 1/2 cup coarsely chopped fresh cilantro leaves, for garnish
  • 1 lime, cut in wedges, for serving

Directions

Place a stockpot over medium heat and coat with 2 tablespoons of the olive oil. Add the onions, garlic, jalapenos, and tomatoes; cook, stirring for 15 minutes until the vegetables are cooked down and pulpy. Pour in the stock, season with salt and pepper, and simmer for 20 minutes.

Meanwhile, heat 1-inch of canola oil in a skillet over medium-high flame. When the oil begins to smoke, add the tortilla strips in batches and fry until they are crisp on all sides. Remove to a paper towel-lined platter and sprinkle with salt while they are still hot.

Ladle the hot soup into 4 soup bowls and put a pile of shredded chicken on top of each. Top with the diced avocado and fried tortilla strips (and cheese if using). Garnish with cilantro and serve with lime wedges.

Chicken Stock:

1 whole free-range chicken (about 3 1/2 pounds), rinsed, giblets discarded

2 carrots, cut in large chunks

3 celery stalks, cut in large chunks

2 large white onions, quartered

1 head of garlic, halved

1 turnip, halved

1/4 bunch fresh thyme leaves

2 bay leaves

1 teaspoon whole black peppercorns

Place the chicken and vegetables in a large stockpot over medium heat. Pour in only enough cold water to cover (about 3 quarts); too much will make the broth taste weak. Toss in the thyme, bay leaves, and peppercorns, and allow it to slowly come to a boil. Lower the heat to medium-low and gently simmer for 1 to 1 1/2 hours, partially covered, until the chicken is done. As it cooks, skim any impurities that rise to the surface; add a little more water if necessary to keep the chicken covered while simmering.

Carefully remove the chicken to a cutting board. When its cool enough to handle, discard the skin and bones; hand-shred the meat into a storage container.

Carefully strain the stock through a fine sieve into another pot to remove the vegetable solids. Use the stock immediately or if you plan on storing it, place the pot in a sink full of ice water and stir to cool down the stock. Cover and refrigerate for up to one week or freeze.


Wednesday, April 28, 2010

Stocking your Kitchen

Stocking a kitchen with great gadgets and utensils can be really fun, although daunting. There are a few ways to begin collecting the equipment, utensils and appliances you need. One is to look through a list like this one, check off what you need, then go on a shopping spree. Another is a trial and error method. As you begin cooking, you'll quickly realize what utensils your kitchen is missing. Believe me, the first way is better! When you want to make a pie crust and realize you have no rolling pin, it can put you off pie crusts forever. If you really want to save money, take some time to cruise garage and tag sales. You can find excellent cooking equipment, utensils, and even appliances for pennies if you are a savvy shopper.

This is the basic list of equipment and utensils for cooking beginners. There may be other items you want to add. That's just fine! As long as a kitchen utensil or gadget works for you, and you use it, it's a good buy. Shop for quality over quantity, especially at first. I have several knives I bought 15 years ago that are still going strong. You can do the same.

Knives

  • made of high carbon stainless steel
  • 3 or 4" paring knife
  • a serrated knife
  • 8 or 10" chef's knife

Measuring Cups and Spoons

  • Various sizes, in metal and plastic
  • Get at least two sets of each, so you're not continually washing them as you cook
  • glass measuring cups with spout, for liquids

Spoons

  • slotted spoon
  • wooden spoons
  • sturdy metal spoons
  • Soup ladle

Mixing Utensils

  • hand held electric mixer
  • Wire whisks in different sizes
  • eggbeater

Spatulas

  • straight spatulas
  • angle handle spatula
  • rubber scraper spatulas

Sieves and Colanders

  • nested varying size sieves, in stainless steel (work as flour sifters too)
  • steel or plastic colander

Pots and Pans

  • 1, 2, 4, and 8-quart saucepans with covers
  • 12" skillet with covers
  • 6 or 8" nonstick skillet
  • roasting pan
  • two 9" round cake pans
  • 9" square cake pan
  • 9"x13" baking pan
  • 9"x5" loaf pan
  • 9" pie pan
  • 12 cup muffin tin
  • cooling racks
  • two cookie sheets

Miscellaneous

  • swivel-bladed vegetable peeler
  • grater with various sized holes
  • rolling pin
  • can opener
  • kitchen timer
  • kitchen shears
  • corkscrew

Tuesday, April 27, 2010

How To Store Potatoes At Home


After the potatoes have been picked, they are stored for a number of weeks. Thereafter, they enter the period of dormancy. When this period ends, the potatoes start to sprout. It is during the dormant period that potatoes are brought to the market, to be sold. The dormancy period of the potatoes has been known to last from one to, as many as, eight weeks. However, the lasting time of the potatoes depends upon the conditions in which they have been stored. Though it is a usual rule that potatoes should be stocked at a lower temperature, there are a number of tips that should be followed to ensure that they are stored properly. Read on to know how to store potatoes at home.
Storing Guide for Potatoes
We have provided the best ways in which potatoes can be stored at home and made to last a long time, without becoming sweet, turning green or sprouting.
  • Before storing the potatoes, put them in a paper bag with holes in it. Avoid using plastic bags, as they tend to increases condensation and thus, lead to development of mold.
  • Potatoes should always be stored at a place which is cool, dark and has lots of ventilation. One of the best options is to store the potatoes in a root cellar.
  • Avoid storing the potatoes in a pantry, as it may lead to their sprouting and dehydration.
  • Potatoes should not be in the refrigerator, especially below a temperature of 7 deg C. This is because below this temperature they develop a sweet taste and get darkened when they are cooked.
  • The ideal temperature at which potatoes should be stored is somewhere around 7- 10 deg C.
  • Never ever store potatoes along with onions. When the two of them are put together, they produce certain gases that spoil both of them.
  • Mature potatoes should not be stored for more than 2 months, while the new ones should be consumed within 1 week.
  • Sweet potatoes should be stored for a maximum period of one week only, since they are very delicate.
  • Never ever keep the potatoes in direct sunlight. In fact, keep them away from prolonged exposure to light. If exposed to light for too long, they become green, develop a bitter taste and might become toxic.
  • Keep on checking the stored potatoes every few days. The moment you see a soft, shriveled or sprouted potato, remove it from the storage area.

Sunday, April 25, 2010

Question: Why Do Onions Make You Cry?


Answer: Unless you've avoided cooking, you've probably cut up an onion and experienced the burning and tearing you get from the vapors. When you cut an onion, you break cells, releasing their contents. Amino acid sulfoxides form sulfenic acids. Enzymes that were kept separate now are free to mix with the sulfurnic acids to produce propanethiol S-oxide, a volatile sulfur compound that wafts upward toward your eyes. This gas reacts with the water in your tears to form sulfuric acid. The sulfuric acid burns, stimulating your eyes to release more tears to wash the irritant away.

Cooking the onion inactivates the enzyme, so while the smell of cooked onions may be strong, it doesn't burn your eyes. Aside from wearing safety goggles or running a fan, you can keep from crying by refrigerating your onion before cutting it (slows reactions and changes the chemistry inside the onion) or by cutting the onion under water.

The sulfur-containing compounds also leave a characteristic odor on your fingers. You may be able to remove or reduce some of the smell by wiping your fingers on a stainless steel scrubber.

Saturday, April 24, 2010

How to Boil Water

It may sound like a no-brainer but boiling water to make various dishes isn't always as simple as it may seem. Here are tips to make sure that boiling water is perfect for that recipe you're planning to cook.


The two basic "boils"

Although water boils at 212°F and only then is it a "real" boil, in some recipes when cooking we use the term "slow boil" as well.

* Slow boil - 205°F: A slow boil is reached when the water bubbles across the entire surface, but without the enthusiasm of a full boil. Bubbles are generally large and slow-moving.

* Full boil (rolling boil, real boil) - 212°F: A full boil is when all the water in the pot gets involved in fast-moving rolling waves of bubbles. The water bubbles enthusiastically and gives off steam.

"Simmer" isn't a boil at all, although it is sometimes called a "gentle boil." In Greek cooking, it is reached by boiling first, then reducing the heat to the stage where small bubbles can still be seen, usually over low heat.

Do bubbles mean boiling? No. Boiling (for water) means reaching a temperature of 212°F and steaming. Bubbles can form well before (as low as 160°F).

Note: Don't be deceived by pots that get hot very quickly around the sides and start to show little bubbles just around the edges. This doesn't fit into any part of boiling; rather, it's just the pot saying, "My sides are getting good and hot. Don't touch."

Water can be brought to a boil quickly over high heat, or slowly over medium heat. In Greek cooking, the water starts out cold, and the general rule of thumb is that if there is no food in the water, go for the high heat and get it to the boiling point as quickly as possible. If there is food in the water (eggs, some vegetables, etc.), bring it to a boil over lower heat. Check recipes for guidance.

Boiling salted water for pasta: Pasta recipes often call for adding the pasta to salted boiling water.

How much water? That general rule says one quart of water for each 1/4 pound of pasta. Making a pound of pasta? Up the water to 6 quarts. Not enough water leads to gummy pasta.

How much salt? The general rule is 1 2/3 teaspoons of salt (kosher sea salt is best) for each quart of water. Add the salt after the water comes to a full boil.

Adding salt may reduce the speed of the boil. Wait until water reaches full boil again before adding pasta.

Why add salt to boiling water for pasta? It's a matter of taste and recipe. If the recipe calls for it, there's usually a reason. If you're watching your sodium intake, don't add it and adjust seasonings later in the recipe.

Boiling water for eggs: This is one of the biggest surprises to those who grew up boiling eggs for 3 minutes for soft, 5 for medium, and 10 for hard.

To make perfect boiled eggs, place in a single layer in a pot with cold water (at least an inch over the eggs). Cover and bring to a full boil over medium heat. As soon as the water reaches full boil, remove the pot from the heat and let sit until done... which depends on the size of the egg, but generally 2-3 minutes for soft-boiled, 15-18 minutes for

Friday, April 23, 2010

entertain a kosher guest in my non-kosher home?

Question: How can I entertain a kosher guest in my non-kosher home?
My home is not kosher. I am hosting a meeting this week, and one of the members keeps kosher. What can I serve?

Answer:

First, it is important to understand that there are many different levels of kosher observance. While some people may feel comfortable eating cold food like sliced carrots and hummus on your plates, other people will only eat store-bought items with certain kosher labels on disposable dishes in a non-kosher home. Unless you have knowledge to the contrary, it is safest to assume they maintain and you should cater to the highest level of kosher observance.

Tips for Entertaining a Kosher Guest in a Non-Kosher Home:
  1. Buy products at the store that have a kosher label on them and that can be served cold (baked goods, crackers, cheese, deli meat, bread, ...).
  2. Either buy dairy and parve products OR buy meat and parve products. Be sure not to buy and serve your kosher guest some dairy and some meat, as Jewish Dietary Laws prohibit mixing dairy and meat.
  3. Buy disposable plates, cutlery and cups. Anything you do to the kosher food should be done with disposable products. Use a disposable knife rather than your non-kosher knife to cut. Serve the food on disposable dishes.
  4. Keep the kosher food you bought separate from non-kosher food. When kosher food is mixed with non-kosher food, it becomes non-kosher. So don't put kosher meat and non-kosher meat together on one plate.
  5. Bring your kosher guest into the kitchen. This enables them to see the kosher label on the cookie box, which increases their comfort zone. It enables them to help you, which is good for them and for you as the host. Lastly, it can ensure success in some tricky cases. For instance, only someone with experience keeping kosher might catch that the mayonnaise, while kosher, is dairy and can't be used in the meat sandwich.
  6. Most importantly, maintain the right attitude. If you are feeling resentful about having to make an extra effort, your guest will feel your resentment and have a hard time enjoying the food. Treat your guest's kosher needs like you would any other dietary restriction.

Thursday, April 22, 2010

Coddled egg recipes

1. "Three-Minute Egg"
INGREDIENTS: 1/4tsp butter - 1 egg - salt & pepper
Butter the inside of the egg coddler and metal lid. Break an egg into the fine porcelain cup. Season to taste with salt and pepper. Screw the lid firmly. Stand the egg coddler up to its neck in a pan of boiling water. Simmer for 7-8 minutes. Lift from water and open.

2. "Oeuf aux Fine Herbes"
INGREDIENTS: 1/4 tsp. butter. 1 egg. 1 tsp. chopped parsley. 1 tsp chopped chives. salt and pepper.
Butter the inside of egg coddler and metal lid. Beat up the egg with the parsley and chives. Season with salt and pepper to taste, and pour into egg coddler. Screw up lid, stand the coddler up to its neck in a pan of boiling water and simmer for 7-8 minutes until cooked.

3. "Cheesy-Egg"
INGREDIENTS: 1/4 tsp. butter. One Egg. 1/2 oz. (15 g) processed or other soft cheese. Salt and pepper.
Butter the inside of egg coddler and lid. Break the egg into the coddler, season with salt and pepper. Cut the cheese into 1/2" cubes and add to egg. Screw up lid and stand coddler up to its neck in a pan of boiling water. Simmer for 7-8 minutes until egg is firm. Serve with cubes of bread or fingers of toast.

4. "Farmhouse Egg"
INGREDIENTS: 1/4 Tsp. butter. 1 Tblsp strips of bacon. 2 tsps. chopped onion. Chopped mushroom. One egg. 1/4 oz. (1 wedge) Gruyere.
Butter inside of coddler and metal lid. Fry the bacon strips, add onions and mushrooms, saute for a minute or so. Empty the mixture into the egg coddler, add the egg and stir. Season with salt and pepper, place the slice of Gruyere on top. Screw up lid and stand the coddler up to its neck in a pan of boiling water. Simmer for 10-11 minutes until cooked.

5. "Oeuf Baron"
INGREDIENTS:1/4 Tsp. butter. 1 1/2 tblsps sliced mushrooms. 1 egg. 1 tblsp chicken liver pate. salt and pepper.
Butter the inside of egg coddler and metal lid. Put the mushroom slices in bottom of egg coddler, season lightly with salt and pepper. Add th egg, season to taste, then add the pate. Screw up lid, stand coddler up to its neck in a pan of boiling water. Simmer for 10-11 minutes until cooked.

6. "Ham'n-Egg"
INGREDIENTS: 1/4 Tsp. butter. 1/2 oz (15 g) cooked ham. 1 egg. salt and pepper.
Butter the inside of coddler and metal lig. Cut the ham into half-inh strips, about 2 1/2" long and line the prcelain cup with these. Add the egg, season with salt and pepper. Screw up the lid and place the coddler up to its neck in a pan of boiling water. Simmer for 7-8 mins oruntil egg is cooked.

7. "Uovo con Tonno" (Tuna Egg)
INGREDIENTS: 1/4 Tsp Butter. 1 egg. 1 tblsp Flaked tuna fish. 2 tsps chopped onion. Salt and pepper.
Butter the inside of the egg coddler and metal lid. Scramble the egg and pour into the porcelain cup. Add finely flaked tuna and chopped onions, stir, season with salt and pepper. Screw up the lid and stand the coddler up to its neck in a pan of boiling water. Simmer for 10-11 minutes until cooked.

Coddled Eggs - How To Coddle Eggs


Coddled eggs are made by very briefly immersing an egg in the shell in boiling water (to cook in water just below the boiling point) to slightly cook or coddle them.

The best eggs for coddling are the FRESHEST EGGS you can find (if eggs are more than a week old, the whites thin out). Whites of fresh eggs will gather compactly around the yolk, making a rounder, neater shape.


What Is An Egg Coddler?

It seems that a lot of people have never seen or used an Egg Coddler. Egg coddlers have been used in England since the 1800s. The original name for an egg coddler was pipkin.

An egg coddler is a porcelain or pottery cup with a lid that is used to prepare a dish called coddled eggs. The eggs are soft-cooked and similar to poached eggs, but the eggs are cooked more slowly than a boiled egg. The lid is a secure top that either clamps on or screws on the dish/cup.

The egg or eggs are broken into the buttered coddler and seasonings of your choice are added. The coddler is then closed with the lid and partially immersed in boiling water for a few minutes. When the eggs are cooked to the desired firmness, the coddler is lifted from the boiling water, the lid removed, and breakfast is served, in a lovely decorated dish.


How To Coddle Eggs - How To Cook Coddled Eggs:

Warning: Egg coddlers should not be used in the microwave. Do not allow your egg coddler to come in contact with an open flame or direct heat. Do not try to cook on a stovetop or burner.

In a large pot, bring water to boiling.

Using paper towel or fingertips, butter the inside of the Egg Coddler and the inside of the metal lid (you can also use olive oil, cooking oil, or non-stick spray).

Using room temperature eggs, break 1 or 2 eggs (according to size of the egg coddler) into the cup, and season to taste with pepper and salt. NOTE: If you use eggs straight from refrigerator, it will require a slightly longer cooking time than an egg that has warmed to room temperature.

Other ingredients can be added to the egg coddler before cooking (such as grated cheese, chopped herbs, and/or chopped ham or bacon). Adding a little cream can make your egg richer and more filling.

Screw on the lid (do not screw the lid on very tightly - a loose turn is sufficient)

Stand the egg coddler in a pan of boiling water making sure that the water level only reaches halfway up the porcelain body of the coddler, as the egg coddler should not be totally submerged in boiling water.

Simmer for 5 to 8 1/2 minutes, depending on the size of your coddler and the size of your eggs (see chart below).

Cooking time for a small egg coddler:

1 large egg - 5 1/2 minutes
1 medium egg - 5 minutes

Cooking time for a large egg coddler:

2 large eggs - 8 1/2 minutes
2 medium eggs - 6 1/2 minutes

Remove the egg coddler from the water using the end of a fork/spoon through the lifting ring or lift using oven mitts or other heat-proof gloves. Set the coddler on a towel, or trivet (not on a cold heat-conductive surface, such as a counter top. Using a towel and holding the lid by the rim, not by the lifting ring, twist the lid to loosen it.

Serve at the table in the coddler.

Saturday, April 17, 2010

Brown Bag Blues

For many kids, including my own, back to school not only means back to books and homework, but back to eating sandwiches for lunch. If you've got kids who don't like buying lunch at school, the whole sandwich scene can get pretty boring by October. But it's not always easy to think of new brown bag lunch ideas.

I'm forever trying out different options in the hope of keeping lunch interesting and desirable.

The first thing to consider when brainstorming brown bag lunch ideas is, of course, your child's food preferences. One child might really like cold pasta salad or even vegetable sushi, while another prefers pita sandwiches or crackers with cheese and fruit. But don't be afraid to try out a few of your own brown bag lunch ideas. It's good to expand your child's food horizons. It may take a few tries, but they may actually ask for it the next time.

For safety's sake, keeping the following lunch entrée options cold until lunchtime is essential. You can do this by packing a reusable ice pack. Or try packing a small water bottle or 100% juice box that has been frozen -- your child will have a slushy drink to enjoy at lunch, and won't have to worry about bringing an ice pack home.

15 Fresh Brown Bag Lunch Ideas

  1. Pasta Lover's Lunch Salad. Pack a cold pasta salad and a plastic fork, and your pasta lover will love you, too! Make your salad with lean meat or low-fat cheese (so it has some protein), lots of vegetables to boost fiber and nutrition, and use a whole-grain blend pasta, like Barilla Plus. Then just drizzle some light vinaigrette over the top and toss.
  2. Pita Pocket Sandwich. Pack your whole-grain pita pocket with chicken Caesar salad, or any other lean meat or cheese filler mixed with vegetables and dark green lettuce.
  3. The Fruit and Cheese Plate Special. Make crispy cracker sandwiches with whole-wheat crackers, slices of assorted cheese, and lean meats. Don't forget the fruit, which goes nicely with the cheese and adds fiber and nutrition.
  4. Cheez Whiz Fun Pack. Pack 1/8 cup of Cheez whiz, along with a plastic knife or spoon, wheat crackers, and celery sticks, and you have a Cheez whiz fun pack!
  5. Bagel With Cream Cheese, Please. Bagels are a wonderful foundation for hardy sandwiches that stand up to being in a backpack or locker all morning. You can toast a bagel in the morning and simply spread some light cream cheese in the middle. Or make a bagel sandwich with, say, a little light cream cheese, some turkey, and cranberry sauce, then top it off with alfalfa sprouts or Romaine lettuce.
  6. Carry a Cobb Salad. Plastic containers can hold the makings of a delicious salad lunch. Fill it with chopped green lettuce, chopped hard-boiled egg, light cheese, and/or lean ham. You can buy packets of light dressing, or just use extra packets of light salad dressing left over from your last trip to the fast-food chain.
  7. It's a Wrap! Wraps are a nice change of pace from the usual sandwich. Use one of the new higher-fiber tortillas, like the multigrain flour tortillas available in most supermarkets. Then fill 'er up with chicken Caesar salad or assorted lean meats, cheese, tomato, sliced onion, shredded Romaine lettuce, and light dressing. Just roll it up and wrap in foil.
  8. Noodle Soup Cups. Many schools offer a hot water dispenser so kids can add hot water to packaged noodle soup cups. Some brands are higher in sodium and fat, and lower in fiber than others. Check out the options in stores like Whole Foods or Trader Joe's.
  9. Veggie Sushi. Not all kids will go for this one, but there are some out there who really like seaweed-wrapped sushi rolls. You can now buy pre-made sushi at many supermarkets, too. Choosing the veggie-filled sushi means there's no chance the sushi will get a little "fishy" while it's in your kid's backpack.
  10. Toss Some Taco Salad. If taco salad is a favorite, you can pack the meat mixture tossed with the shredded cheese, tomatoes, and chopped Romaine lettuce in a plastic container. At lunchtime, your child can add crunchy, reduced-fat tortilla chips and a little light dressing.
  11. Fried Rice Can Be Fun. When made with eggs or chopped lean ham and lots of veggies, cold fried rice can be a satisfying noontime treat. Make your own, or plan on leftovers the night before if you're ordering from a restaurant.
  12. Talk About Taquitos. I started doing this last year, and it seems to have stuck with my girls. I pop some Bean and Cheese frozen Taquitos from Whole Foods into my toaster oven in the morning, then let them cool. Then, I wrap them in foil and make sure they stay cool by packing a frozen juice box or small water bottle. By noon, they are cold, fun finger food.
  13. BBQ Chicken Sandwich. Your child can assemble a yummy BBQ grilled chicken sandwich fresh at lunchtime. Just pack a grilled, boneless, skinless chicken breast (you can make it in your indoor grill the night before) with some lettuce and sliced tomato in one baggie, and a whole-wheat bun in another. Add a packet of BBQ sauce to the lunch bag, and it's good to go.
  14. Meal Muffins. Certain types of muffins work as a lunch entrée. If you bake them over the weekend and keep them in the freezer, you just have to pull one or two out in the morning. By lunch, they are nicely chilled and ready to eat. Try ham and cheese muffins, Mexican Cornbread muffins, or quiche muffins (quiche filling, baked with or without crust in a muffin pan).
  15. Turkey Jerky. You can round off a lunch packed with fruit, vegetables, and maybe trail mix or crackers by adding some high-protein turkey jerky. I found a turkey at Trader Joe's that is made without nitrites, MSG, or artificial ingredients, and the turkey is raised without added hormones. Can't argue with that. A 2-ounce serving of turkey jerky contains: 120 calories, 22 grams of protein, 12 grams of carbohydrate, 540 milligrams of sodium, and 20 milligrams of cholesterol.

Thursday, April 8, 2010

BBQ Cooking times and guidlines

The cooking times and temperatures outlined in this chart are guidelines only and may vary based on cooking conditions and the actual barbeque.

Low = 300ºF
Medium = 450ºF
High = 650ºF

>FOODSETTINGCOOKING TIME
BEEF
Hamburger 3/4" thickMediumMedium: 8 to 10 minutes
Well Done: 10 to 15 minutes
Frozen PattiesLow to MediumMedium: 12 to 14 minutes
Steak 1" ThickMediumRare: 3 to 6 minutes
Medium: 6 to 9 minutes
Well Done: 9 to 12 minutes
RoastLowRare: 12 to 15 minutes/lb
Medium: 15 to 20 minutes/lb
Well Done: 20 to 25 minutes/lb
PORK
Chops 1/2"MediumMedium: 8 to 10 minutes
Well Done: 15 to 20 minutes
Ribs (3-4 lb)Low to Medium (indirect)45 to 90 minutes
Roast (3-5 lb)Low to MediumWell Done: 18 to 23 minutes/lb
LAMB
Chops 1/2"Medium6 to 12 minutes
POULTRY
Chicken (2 1/2 - 3 1/2 lb)Low (with rotisserie burner)75 to 90 minutes
Turkey/Chicken (2-5 lb)Medium/Low30 minutes/lb
Chicken-halved/quarteredLow25 to 30 minutes
Chicken Breast (6 oz)Medium (direct)8 to 12 minutes
Boneless Chicken Breasts(halves)Medium10 to 12 minutes
SEAFOOD
Fillets 6-8 ozMedium to Hot8 to 12 minutes
Steaks 1" thickMedium to HotWell done: 10 to 15 minutes
Shrimp large or jumboLow to Medium8 to 12 minutes
General Guidelines: * if fish is frozen, brush with oil & double grilling time.
VEGETABLES
(wrap vegetables in foil)Baking Potato, wholeMedium25 to 30 minutes
Corn, whole**Remove outer husks and soak in water prior to grillingLow to Medium15 to 20 minutes
Zucchini, halvedMedium6 to 10 minutes
**The higher the water content or density of the vegetables you are cooking, the longer the cooking time.

Tuesday, March 30, 2010

Hot Cross Buns! A wonderful Easter Tradition

It's easy to see why these spiced buns mark the start of Easter. Religious symbolism aside, their light texture and gentle sweetness make for a perfect spring breakfast. Follow Our step-by-step recipe and welcome the morning sunshine into your kitchen. The symbolism of the hot cross bun has fueled much debate over the years. Stories abound: one is that in Tudor times the English church, in a fit of anti-Popish pique, tried to ban them, but in light of their continued popularity, Elizabeth I relented and allowed them to be eaten during religious festivals. Others believe the bun is of pagan origin, its cross representing the four quarters of the moon or a sign to ward off sickness. In recent years, some schools have courted controversy by taking the buns off their menus in an act of political correctness. But despite historical and religious ructions, the scent of spice and sugar wafting from baking buns remains redolent of harmony and abundance, the mixture of fruit and peel in the dough adding a little luxury.I thought we'd give you some hot tips on how to make great Hot Cross Buns - plus throw in a recipe for you.

Throughout the whole bun making process, try to keep everything warm.

1) Preparing yeast liquid The liquid for reactivating yeast should be "warm", "tepid", or at "blood heat". Approximately 37 C. The correct temperature can be achieved by pouring cold water or milk and boiling water into a measuring jug in equal quantities.

2) Measuring dry ingredients and mixing In cold weather use a warm bowl. Measure all dry ingredients into the bowl. Cut or rub in butter .

If desired melt butter or use oil, add with yeast liquid. When mixing, the consistency of dough should not be sticky. An easy guide - turn dough out onto a lightly floured bench, knead 2-3 minutes. If it sticks to your fingers and bench, give a light dusting of flour. If dough is too dry a little warm liquid could be kneaded in. If dough is too stiff it will be difficult to knead, slow to rise and produce hard, dry buns. If dough is too sticky, buns will not hold their shape while cooking.

3) Kneading In cold weather, pour boiling water on your bench, dry well, with flour, before tipping out dough. Kneading is the alternate stretching and folding of the dough which strengthens the gluten - elastic like protein particles in the flour which makes the dough springy so it is able to stretch to surround the bubbles of carbon dioxide produced by the yeast. The kneading process takes about 10 minutes. The dough should feel smooth, springy, elastic and have a "satin" look about it.

4) First rising in bowl Put dough back into a lightly greased bowl, turn over once to grease top. Cover loosely. Put in a warm place. Avoid dry or direct heat. Allow dough to double in size. The time it takes is not important as it will vary according to temperature. From 1-2 hours or in winter up to 3 hours. Dough should have a round, plump appearance. If sufficiently risen, the imprint of fingertips will remain on top of dough.

5) Shaping dough Knead dough for 1-2 minutes. Shape into buns 4 cups flour will produce 16 - 75g buns. Place buns on a lightly greased, warm oven tray.

6) Proving Yeast is a fungus type of mico-organism which grow best in a warm, humid environment. Allow buns to double in size before cooking. In a warm place it should only take about 30-40 minutes, but it could take up to 1 hour. If under-proved, they will be small and hard.

Moist, warm places for proving:

The Oven: preheat on lowest temperature. Turn off. Sit bowl or tray on a rack over a pan of boiling water. Shut oven door and don't peak for at least an hour. Electric frypan: pour in a little boiling water, add lemon juice to prevent pan discolouring. Set to lowest heat. Sit bowl or tray on a cake rack over water. Place on lid, close vent.

Hot water cupboard: tends to be too dry for buns - a skin forms which inhibits proving. Ideal for bread if the tin is enclosed in a large plastic bag or cover loosely with plastic wrap.

7) Cooking Buns should be cooked in a very hot oven. Melted butter and sweet glazes are applied when cooked.

A point to remember: yeast is alive - feed and keep it warm but most importantly don't rush it and it will reward you well. Happy cooking.

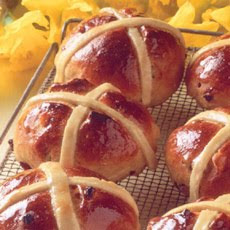
16 PERFECT STICKY HOT CROSS BUNS

1/2 cup milk

1/2 cup boiling water

1 teaspoon muscavado or brown sugar

1 level tablespoon yeast

4 cups white flour

2 tablespoons muscavado or brown sugar - extra

1/4 teaspoon salt

1 tablespoon butter

1 cup mixed fruit

1 tablespoon mixed spice

1 egg - lightly beaten

Pour milk and water into a bowl. Stir in sugar, sprinkle over yeast. Set aside for approx. 5 minutes or until yeast mixture is nice and frothy. Using a larger bowl, mix together flours, extra sugar and salt. Rub in butter, add fruit and spice. Make a well in the center, pour in yeast liquid plus egg, mix thoroughly, dough should be slightly sticky - a little more warm liquid may need to be added. It could be up to an extra 1/4 cup. Turn onto a lightly floured bench Knead for 10 minutes. Return dough to a warm, greased bowl, leave in a warm place to double in bulk. Approx. 1 hour. Punch dough down, turn onto a lightly floured bench, knead 2-3 minutes. To shape buns: Divide dough into 16 pieces. Shape into balls. Place onto a lightly greased tray, one finger width apart. Return to a warm place to double in bulk. Approx. 1 hour. At this stage carefully place on crosses. Bake at 220degC for 8-10 minutes. Brush hot buns with glaze. Deliciously Sticky !!

Sticky glaze: Mix 2 tablespoons muscavado or brown sugar, 1/2 teaspoon cinnamon with 1/4 cup boiling water. To create a syrup, microwave for 2-3 minutes.

Crosses: Rub 1 tablespoon chilled butter into 1/4 cup flour then mix to a soft dough, using 2 tablespoons cold water. Divide into 6 portions then roll each into a long string the thickness of your cross. Cut into appropriate lengths and place carefully onto risen buns just before they go into the oven.

Monday, March 29, 2010

Baked Bean 101


Here is a fantastic article, I cannot describe this any better nor would I try. Baked Beans are such a wonderful earthy homey dish they deserve a re look as a family classic. Here is Cook’s Illustrated break down of the most consistent issues arising from homemade Baked Beans.

Cook’s Illustrated, October 1996, Vol. 22, Page 14-15
By Mark Zanger (Reference)

You cannot cook these beans quickly. It is a long, slow process. The simpler the recipe, the better the results.

Salt pork: the fatter, the better – not the meatier type! Remove rind.


Bacon: meaty, smoke flavor - freeze slightly to allow slicing & dicing.


Dice salt pork and bacon, then fry to render fat

Small white beans, not Great Northern, and omit overnight soaking.


Food Science

Beans on Acid -- Legumes and Levels of Ph

Have you ever cooked beans for hours and found they failed to soften? Chalky and tough-skinned, they might as well be raw. A few phone calls to experts and some research pointed me to the prime suspect: acid. Food scientists universally agree that high acidity can interfere with the softening of the cellulose-based bean cells, causing them to remain hard no matter how long they cook.

Alkalinity, on the other hand, has the opposite effect on legumes. Alkalines make the bean starches more soluble and thus cause the beans to cook faster. (Older bean recipes often included a pinch of baking soda for its alkalinity, but because baking soda has been shown to destroy valuable nutrients, few contemporary recipes suggest this shortcut.) The effect of acids and alkalines on beans certainly explained the warnings I found in some recipes against the use of too much vinegar. Still, while it all sounded good in theory, it made little practical sense to me. Molasses is acidic, but it didn't seem to affect the cooking of the beans in most of my tests. What I really wanted to know were the following: At what pH level would there be a negative impact on the beans? Could a splash of vinegar spoil the pot, or would it take a whole bottle? How could I relate pH levels to the everyday ingredients I might use to flavor beans?

It was time to put some beans to the acid test. I cooked four batches of small white beans in water altered with vinegar to reach pH levels of 3, 5, 7, and 9. I brought them to a boil, reduced the heat to a low simmer, and tested the beans every 30 minutes for texture and doneness. The beans cooked at a pH of 3 (the most acidic) remained crunchy and tough-skinned despite being allowed to cook 30 minutes longer than the other three batches. The beans cooked at pHs of 5, 7, and 9 showed few differences, although the 9 pH batch finished a few minutes ahead of the 7 pH batch and about 20 minutes ahead of the 5 pH batch.

Acidity, then, must be relatively high to have any significant impact on beans. I had to add a whole cup of vinegar to the pot -- much more than would be reasonable in most recipes -- to reach a pH of 3.

How does my Boston baked beans recipe fit into this scenario? The combined ingredients -- just before baking -- had a pH of 4.8. The beans might cook a little faster with the acidic molasses and mustard reserved until the end, but the flavor would lack the depth developed through slow cooking -- a trade-off I wasn't willing to make. If in making this recipe you are plagued with crunchy beans, you may have extremely hard water or a stale batch of beans. Hard water, recognizable by mineral deposits in pots and plumbing and greenish rings around the drains in porcelain tubs and sinks, contains high levels of calcium and magnesium. Calcium, for reasons not yet fully understood, toughens cellulose. Your safest bet would be to use bottled water.

Stale beans are

impossible to

detect until cooked,

but it's too late by

then -- they will

never soften.

Recap

Molasses = Acidity (+ vinegar, mustard)
The pH level is a measure of acidity vs. alkalinity.
A pH (3) Acidic > undercooked, hard beans.
A pH (9) Alkaline > beans exploded, mushy, overcooked.
Bean cell walls made of cellulose, hemicellulose & pectin. In presence of acidic element, hemicellulose doesn’t break down as readily as beans cook, leading to hard beans. In alkaline environment, pectin dissolves weakening cell walls leading to mushy results

Baking soda (alkaline), added to recipe, does significantly decrease cooking time by almost 1/2 > overcooked beans exploded, starchy, lacked flavor.

By omitting acidic ingredients until the end of cooking > beans cooked quickly but beans light in color, have less flavor, not worth time-savings in long run.

Avoid stale beans, if possible, by buying them from a store, which moves their supply and replaces them often. The recipe, which I have used over the years, turned out hard as a rock beans the last time I cooked it. I thought it was the salt and began to attempt recipe revision. The error in my thinking was that I had done that recipe many times successfully so the salt content alone could not possibly be the reason for the failure. The acidity also could not have been the problem for the same reason. The problem was, “Stale beans are impossible to detect until cooked, but it's too late by then -- they will never soften.” So stop blaming the salt; blame the stale beans. And always start with the freshest beans you can find to prevent this from happening to you.

This would seem to discourage using the pressure cooker to cook beans. I would still like to try that method. To date I haven’t.

Saturday, March 27, 2010

How to fix an overspiced dishes


You're making your favorite chili when you taste it and realize that the jalapenos you used this time were way hotter than you expected. Not to worry, there are a number of fixes to foods being too hot. The first thing to always do is taste your chile peppers. Peppers will fluxuate in the amount of heat they have and the only way too really know for sure how hot they are is to taste them. If they seem a little hotter than normal you can cut down on the amount you use and you can also make sure that you remove all of the inner membranes and seeds. This is where the majority of the heat lies in a pepper. Failing that, don't fear, all is not lost. Of course you could just add more of everything else if you want, but what if you don't want 3 gallons of chili or 1 gallon of salsa? There are still a number of options open to you. There are really three things that will help counteract the heat of chilies. They are sugar, acids, and dairy products. That said, you have a whole arsenal in your kitchen to combat spicy foods. Try adding a can of crushed pineapple to your chili. It will virtually disappear, leaving very little traces of itself while helping to counteract the heat. Give that super spicy salsa a few squirts of lime juice to help tame it, or, if appropriate add some dairy, in the form of sour cream or yogurt into a spicy sauce. At the table, offer sour cream and cheese to help counteract the heat or offer chopped cilantro which also seems to have a cooling effect on the mouth. Also remember that milk or dairy based drinks are the best way to cool a burning mouth. Highly sweetened, non carbonated drinks are second best. Stay away from water as all it does is spread the heat around in your mouth while doing very little to counteract it.

Wednesday, March 10, 2010

Hashbrown patties, plain and simple


Good old fashioned restaurant-style hash browns. Perfect with hot pepper sauce and ketchup!
Prep Time: 20 Min Cook Time: 15 Min Ready In:35 Min
Serves:4

Ingredients

  • 2 medium russet potatoes, shredded
  • 1/2 medium onion, finely chopped
  • 1/4 cup all-purpose flour
  • 1 egg
  • 1 cup oil for frying, or as needed
  • salt and pepper to taste

Directions

  1. Rinse shredded potatoes until water is clear, then drain and squeeze dry. Place shreds in a bowl, and mix in the onion, flour and egg until evenly distributed.
  2. Heat about 1/4 inch of oil in a large heavy skillet over medium-high heat. When oil is sizzling hot, place potatoes into the pan in a 1/2 inch thick layer. Cover the whole bottom of the pan, or make separate piles like pancakes. Cook until nicely browned on the bottom, then flip over and brown on the other side. It should take at least 5 minutes per side. If you are cooking them in one big piece, it can be cut into quarters for easier flipping.
  3. Remove from pan, and drain on paper towels. Season with salt and pepper and serve immediately.
Amount Per Serving Calories: 183 | Total Fat: 6.9g | Cholesterol: 53mg

Tuesday, March 9, 2010

Food Handler Certification Program


Food Handler chef The danger zone

  • the Danger Zone is the temperature range between 4°C and 60°C

    Keep food out of the Danger Zone. Bacteria will multiply quickly in the Danger Zone. Bacteria grow extremely well at body temperature, 37.1°C.

  • keep hot food hot (60°C or above)

    Have a probe thermometer available to check the temperature of the food on the steam table and on the stove. Cover food to keep the heat in and to prevent contamination.
Thermometer
  • keep cold food cold (4°C or below)

    Provide a reliable thermometer to ensure proper operation of the refrigerator. Place food in the refrigerator so that air can circulate around it freely to maintain proper temperature.
  • do not allow hazardous food to be in the Danger Zone longer than 2 hours when preparing food

    Move hazardous food through the Danger Zone as quickly as possible.

  • cool food quickly using shallow pans or an ice bath

    Do not allow food to cool to room temperature before chilling in a refrigerator.

    Pan or Ice Bath

  • quickly reheat food to at least the original cooking temperature.

    See page 34 for a list of cooking and reheating temperatures. Whole chickens must be cooked to 82°C but can be reheated to 74°C.

  • if hazardous food is displayed for sale at room temperature for any length of time, the food must not be eaten and properly disposed of

    Pathogenic bacteria will not multiply fast enough to cause food poisoning outside the Danger Zone but will multiply fast enough in the Danger Zone.
  • How to Reduce Fat and Sugar and Increase Fiber

    Most baked goods are high in fat and often in sugar, but it's possible to create nutritious, low-calorie baked goods just as tasty as their normal counterparts. Everything that tastes good must be unhealthy - or does it? Generally yes, at least when it comes to baked goods, but it is possible to lower the amount of calories and use more nutritious ingredients.

    Reduce Fat

    • Most baking margarine and shortenings are high in trans-fat (this depends on where you live - in many European countries the trans-fat content is negligible). Normal margarine can be used in baking if they contain at least 70% fat.
    • Often fat can be replaced with canola oil, which is trans-fat free. As oil is 100% fat and margarine is usually 80% fat, so the amount of fat and liquids may need to be adjusted slightly.
    • You can often substitute some of the fat with a nut butter. Almond and cashew butter are delicious and healthy options with a milder taste than peanut butter.
    • Apple puree can substitute for most or even all of the fat in many recipes. Prune puree works well for chocolate cakes and cookies. Obviously fat substitutes and oil cannot be used if the recipe requires creaming the margarine with sugar.
    • Pie crusts tend to be high in fat, but the calories can be reduced by using low-fat sour cream or mashed potatoes for moistness.

    Reduce Sugar

    • The amount of sugar can often be lowered by 1/3 or even as much as 1/2, or some of it replaced with stevia or other sweeteners. Sometimes the texture may suffer, though, so experiment in advance before conducting a party!
    • Brown sugar is rich in nutrients (the darker the better), making it a healthier choice. Its characteristic flavor goes well in most baked goods.
    • Liquid alternatives include honey, molasses and agave syrup - just remember to adjust the total amount of other liquids accordingly. Agave syrup is mostly fructose and has a very low glycemic index.

    Increase Fiber

    • Some of the wheat flour can often be replaced with more nutritious and fiber-rich alternatives, like graham/whole-wheat flour, spelt flour, oat flour, quinoa flour or the earthy buckwheat flour. Note that this may result in a denser texture. In cookies and pie crusts all wheat flour can usually be replaced with other flours.
    • Psyllium husk, sold in the bakery departments of well-equipped grocery stores, is rich in fiber. It is also used to improve the texture of gluten-free baked goods.
    • Uncooked oatmeal, oat or wheat bran, other cereals and seeds add fiber and flavor to breads and rolls.
    • Grated carrots are great in breads and cakes, but grated beetroot and zucchini can be used too. Some people even report great results from using mashed beans in brownies.

    Eggs

    • Most people do not need to avoid eggs (unless they want to do it for ethical reasons), but it may be warranted due to allergies and for some people with high cholesterol. Besides commercial egg re-placers options include soy flour, mashed bananas, corn starch and soaked flax seed, if the recipe doesn't require beating the eggs.

    Naturally Low-fat Baked Goods

    The choice of baked goods makes a big difference. Cinnamon buns and angel food cake are fairly low in fat, but cookies, donuts, puff pastry and phyllo dough are much heavier in fat and calories. A few small pastries may exceed the recommended daily intake of calories! Yeast-leavened dough makes for pies and pastries much lower in calories than traditional crusts.

    Butter cream, cream cheese frosting and most other icings are high in fat and sugar. Consider topping baked goods with fruit and berries instead, perhaps with some vanilla sauce. Cheesecakes can be lightened with yogurt, quark or tofu. Fresh ricotta is fairly low in fat.


    Monday, March 8, 2010

    Kitchen Disaster fixes

    Everyone has had a disaster in the kitchen at one time or another. Even the most experienced cook can be distracted and add too much salt, forget to set the timer, or omit a crucial ingredient. This advice will help you fix disasters and prevent them from happening in the first place.

    • SOUP OR STEW TOO SALTY
      Make sure you never measure seasonings right over the pot or bowl. It's just too easy for your hand to slip, the cat to run under your legs, or someone to startle you. If it's already happened, we used to think that adding a raw cut up potato added to the soup would absorb much of the additional salt, but recent research has disproven this. Really the only way to diminish the salt is to add more of the other ingredients to the soup; in other words, add more of every ingredient except the salt. This is also the only way to fix recipes when you've added too much hot sauce, Tabasco, cayenne pepper, or chilies.
    • HARD COOKED EGGS WON'T PEEL
      If the shell sticks to your hard cooked eggs, try putting the eggs in a bowl of very cold water. Then gently tap the eggs against the side of the bowl under the water. Water will seep in through the cracks and loosen the shell from the egg. The peel should come off more easily in a few minutes.
    • BROKEN CAKES OR COOKIES
      When the cake breaks when you remove it from the pan or cookies are crumbling, turn your disaster into a trifle or parfait. Just layer the pieces with sweetened whipped cream and some fresh fruit in a glass bowl or individual glasses and chill until serving time.
    • SOGGY VEGETABLES
      If your vegetables have been overcooked and are limp and olive green, just whizz them in the blender or food processor with a little bit of cream or butter. Pureed veggies are very trendy right now and no one will be the wiser. You can also add more cream and turn the veggies into a cream soup.
    • CRACKED CHEESECAKE
      If your cheesecake cracks on top, top it with a fruit topping, chocolate sauce, sour cream or whipped cream. So that doesn't happen next time, put a pan full of water on the rack below your cheesecake while it's baking in the oven. Also run a knife around the crust to loosen it from the pan when you remove it from the oven. Sometimes cheesecakes will just crack and there's nothing you can do about it!
    • SAUCE BURNED ON BOTTOM
      Remove the pan from the heat immediately! Don't stir. Place the bottom of the pan into a sink full of cold water to stop the cooking. Don't stir the sauce! Pour the top 3/4 of it into a new pan, leaving the burned part behind. Taste the sauce. It might still be okay, but if you detect any burned flavor, you'll have to throw it away and start over.
    • LUMPY GRAVY
      Pour the gravy through a sieve into another saucepan. Don't press the gravy through - just let it drip through the sieve.
    • CANDY WON'T SET
      When you're making cooked candy and it just won't set, add a few tablespoons of cream, return it to the heat, bring it to a boil and cook to the correct temperature as specified in the recipe. Cooked candies are simply concentrated sugar solutions. Removing more liquid by boiling is the only way to fix this problem.
    • RUNNY FROSTING
      When faced with runny frosting, your first thought is to add tons more confectioner's sugar. But if the frosting is really runny, you probably don't have enough sugar to fix it. Divide the frosting in half and add confectioner's sugar to half of it. You'll have a better chance of thickening it this way.
    • SEPARATING EGGS
      If you are separating eggs and a bit of yolk gets into the white, take a piece of egg shell to scoop out the yolk. This works much better than using a spoon or your fingers. When you are separating large numbers of eggs, crack each one over a small bowl, separate the yolk from the white, then pour the white into a larger bowl with the others. This will prevent contaminating the whole bowl with one broken yolk.
    • CAKE STICKS TO PAN
      Make sure to grease the cake pan using shortening or butter that is UNSALTED. Salted shortening will make the cake stick. Try returning the cake to the oven for 3-4 minutes until the pan is hot. Then place the hot pan on top of a wet kitchen towel for about a minute. Or you can spin the cake pan on a stove burner for a few seconds to heat the bottom.
    • GENERAL ADVICE
      • Read the recipe before you begin cooking.
      • Make sure you have all the ingredients on hand.
      • Get in the habit of setting a timer five minutes less than the recipe suggests. And carry the timer with you if you leave the kitchen!
      • Never measure any ingredient over the mixing bowl or saucepan.
      • Test your oven accuracy using an oven thermometer.